About Your Watch

Congratulations on purchasing your TIMEX® watch. Please read these instructions carefully to understand how to operate your Timex timepiece. Your watch may not have all of the features described in this booklet.

For more information, please visit Timex.com.

How to Start Your Watch

To start your watch, remove the plastic guard from under the crown (if applies), set the Time and Date (if applies), then press the crown in against the case (position A). Slowly turn the crown clock-wise until you feel resistance. You should hear the watch “ticking” and the second hand will begin to move.

As you wear the watch the movement of your wrist will wind the movement automatically. If the watch is worn daily the movement will retain enough energy to prevent the watch from stopping. If the watch stops due to non-wear, follow the instructions to set the Time and Date (if applies), and wind to start the watch again.

Water and Shock Resistance

If your watch is water-resistant, meter marking or (Water resistance wave mark) is indicated.

Water-Resistance Depth p.s.i.a.* Water Pressure Below Surface
30m/98ft60
50m/164ft86
100m/328ft160

*pounds per square inch absolute

  1. Watch is water-resistant only as long as crystal, crown and case remain intact.
  2. Watch is not a diver watch and should not be used for diving.
  3. Rinse watch with fresh water after exposure to salt water.
  4. Shock-resistance will be indicated on the watch face or caseback. Watches are designed to pass ISO test for shock-resistance. However, care should be taken to avoid damaging the crystal.

Setting Your Watch

To Set Time

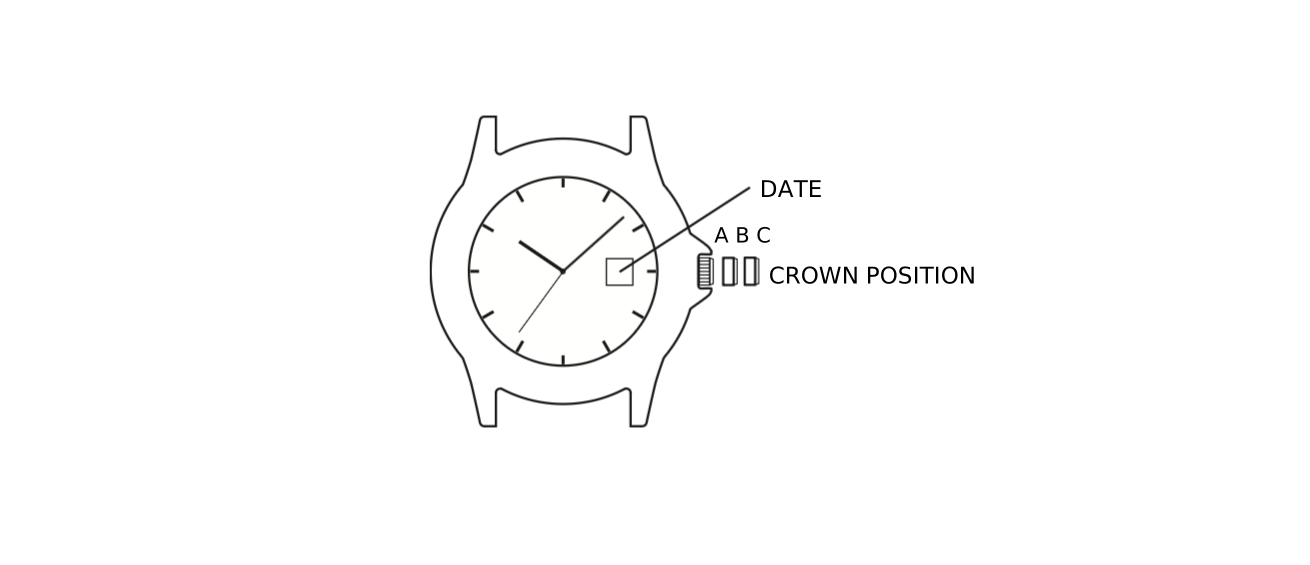
  1. PULL crown to position C and turn until the hour and minute hands display the correct time. Note correct time of day (A.M. or P.M.) for proper date function (if applies). The date will advance between 9:00 PM and 1:00 AM.
  2. Push crown to position A.

To Set Date, Day (If Applies)

  1. PULL crown to position B and turn COUNTER-CLOCKWISE until correct day appears. Turn CLOCKWISE until the correct day of the week appears. Note: if the date is set between the hours of around 9:00 PM and 1:00 AM, the date may not change the following day. If this occurs, reset the Time and Date at any other time than between the hours of around 9:00 PM and 1:00 AM to ensure proper date function.
  2. Push crown to position A.
Watch case diagram labeled Date and Crown Position with positions A, B, C

True GMT

GMT watches in which the hour hand is independently adjustable are often referred to as a true GMT. Please follow the instructions below to determine if your watch falls into this movement type.

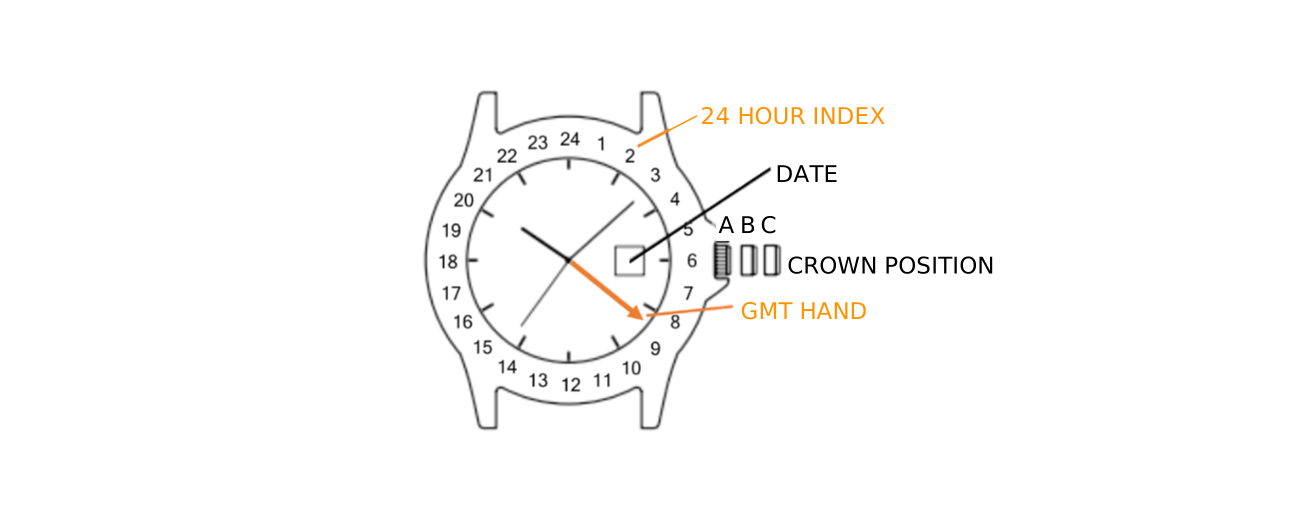
Watch face diagram labeled 24-Hour Index, Date, Crown Position A B C, and GMT Hand

Setting the Time, Date and GMT Hand

The prescribed method to set this type of watch is to use crown position C to set the GMT hand and the minutes within the hour to your “home” time zone. Then use the crown position B to adjust the hour hand and the date to your 2nd or “current” time zone. You will also be able to quickly adjust the hour hand to any new destinations, if your travel takes you thru multiple time zones, using the crown in position B to adjust the hour hand independently.

  1. Crown position A (completely pushed in or the “unlocked” screw-down crown) will allow you to manually wind the watch movement if you wish to do so.
  2. Crown position B is used to adjust the hour hand, independent of the other hands and is also used to adjust the date.
    1. Turning the crown clockwise will adjust the hour hand and the date backwards.
    2. Turning the crown counter-clockwise will adjust the hour hand and the date forwards.
  3. Crown position C is used to adjust the hour hand and minute hands in unison and is also used to adjust the GMT hand. When setting the time, make note of Noon and Midnight to ensure you are setting the time correctly. If the date is changing in the middle of the day, you will need to adjust the time 12 hours ahead and reset the date to display the current date.
    1. Turning the crown clockwise will adjust all hands and date backwards.
    2. Turning the crown counter-clockwise will adjust all hands and date forwards.

When setting the GMT hand, you will look at the index track along the edge of the dial. You will note that this track is 0 to 24 hours. The GMT hand will only travel the dial once every 24 hours. Select the correct position to display the current time in the 2nd time zone you wish to track.

  1. After setting the watch to the desired time, date and 2nd time zone push the crown in to position A, and if applies, return the screw-down crown to the locked position.

Office GMT

GMT watches in which the hour hand is geared to be set along with the minute hand, as you would with a standard analog watch are often referred to as an office GMT. Please follow the instructions below to determine if your watch falls into this movement type.

Setting the Time, Date and GMT Hand

  1. Crown position A (completely pushed in or the “unlocked” screw-down crown) will allow you to manually wind the watch movement if you wish to do so.
  2. Crown position B is used to adjust the date and is also used to adjust the GMT hand.
    1. Turning the crown clockwise will adjust the date.
    2. Turning the crown counter-clockwise will adjust the GMT hand.

When setting the GMT hand, you will look at the index track along the edge of the dial. You will note that this track is 0 to 24 hours. The GMT hand will only travel the dial once every 24 hours. Select the correct position to display the current time in the 2nd time zone you wish to track.

  1. Crown position C is used to adjust the time. When setting the time, make note of Noon and Midnight to ensure you are setting the time correctly. If the date is changing in the middle of the day, you will need to adjust the time 12 hours ahead and reset the date to display the current date.
  2. After setting the watch to the desired time, date and 2nd time zone push the crown in to position A, and if applied, return the screw-down crown to the locked position.

GMT Reference

24-Hour GMT Index

If your watch is equipped with a 24-hour index printed at the outer edge of the dial, you can track an alternate time zone by aligning the GMT hand with the current time in the desired time zone as indicated on the 24-hour index.

Rotating GMT Bezel

If your watch is equipped with a rotating bezel with a 24-hour index, you can track an alternate time zone by rotating the bezel to align the GMT hand with the current time in the desired time zone.

Reading the GMT Analog Display

GMT Hand + 24 Hour Index on the Rotating Bezel

After setting the time to the desired time zones you can review time zone 1 by using the hour and minute hands on the main dial. The rotating bezel is normally worn in the standard position with the 24-hour marking aligned with the 12 position. You can review time zone 2 by reviewing the GMT hand against the 24-hour index on the bezel. For most places, but not all, the minutes within the hour are the same across the time zones. You can also review the minute hand on the main dial for a more accurate view of the minutes within the hour.

GMT Hand + 24 Hour Index on the Dial

After setting the time to the desired time zones you can review time zone 1 by using the hour and minute hands on the main dial. The 24-hour index on the dial will have the 24-hour aligned with the 12 position. You can review time zone 2 by reviewing the GMT hand against the 24-hour index on the dial. For most places, but not all, the minutes within the hour are the same across the time zones. You can also review the minute hand on the main dial for a more accurate view of the minutes within the hour.

GMT Hand + 24 Hour Index on the Dial + 24-Hour Index on the Rotating Bezel

If your watch is equipped with a rotating bezel with a 24-hour index as well as a 24-hour index on a rotating bezel you can track three time zones by rotating the bezel to align the GMT hand with the current time in the desired third time zone. Zone 1 will be viewed with the main dial hour and minute hands. Zone 2 will be the GMT hand viewed with the 24-hour index on the dial. Zone 3 will be the GMT hand viewed with the 24-hour index on the rotating bezel. For most places, but not all, the minutes within the hour are the same across the time zones. You can also review the minute hand on the main dial for a more accurate view of the minutes within the hour for zones 2 and 3.

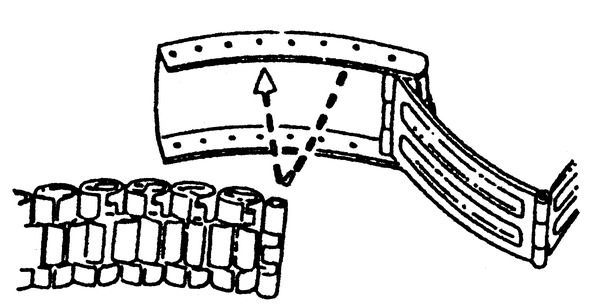
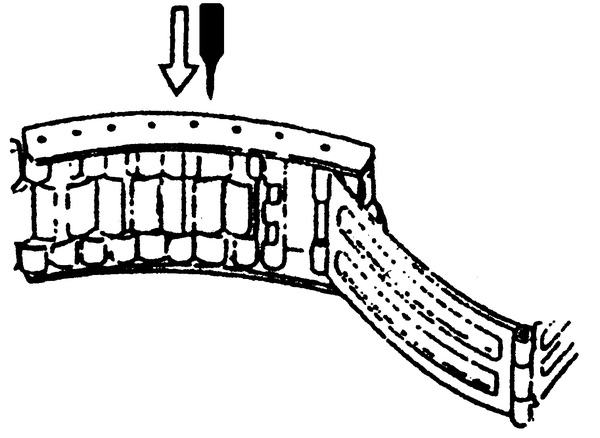
How to Adjust Bracelet

(Variations of the following bracelet sections apply to all watch models).

Sliding Clasp Bracelet

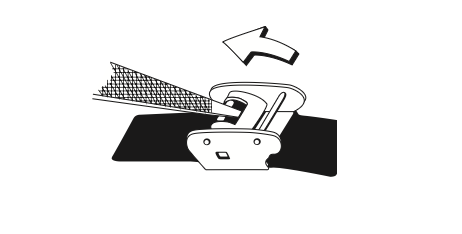
Sliding clasp bracelet mechanism showing the locking plate and grooves on the underside of the bracelet
  1. Open locking plate.
  2. Move clasp to desired bracelet length.
  3. Exert pressure while holding locking plate and slide clasp back and forth until it engages in grooves on underside of bracelet.
  4. Press locking plate down until it snaps closed. Clasp can be damaged if excessive force is used.

Foldover Clasp Bracelet

Pointed tool pushing in the spring bar while gently twisting the bracelet to disengage
Fig. 1
Spring bar being inserted into the correct bottom hole
Fig. 2
Spring bar pushed down, aligned with the top hole, and released to lock in place
Fig. 3
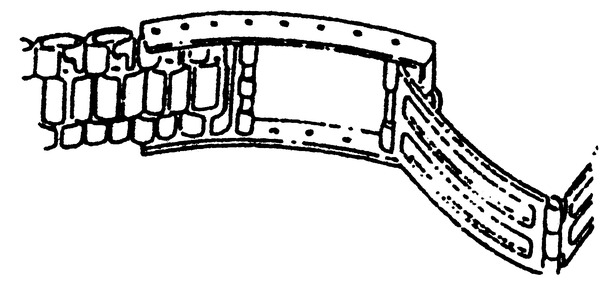
  1. Find spring bar that connects bracelet to clasp.
  2. Using a pointed tool, push in spring bar and gently twist bracelet to disengage.
  3. Determine wrist size, then insert spring bar in correct bottom hole.
  4. Push down on spring bar, align with top hole and release to lock in place.

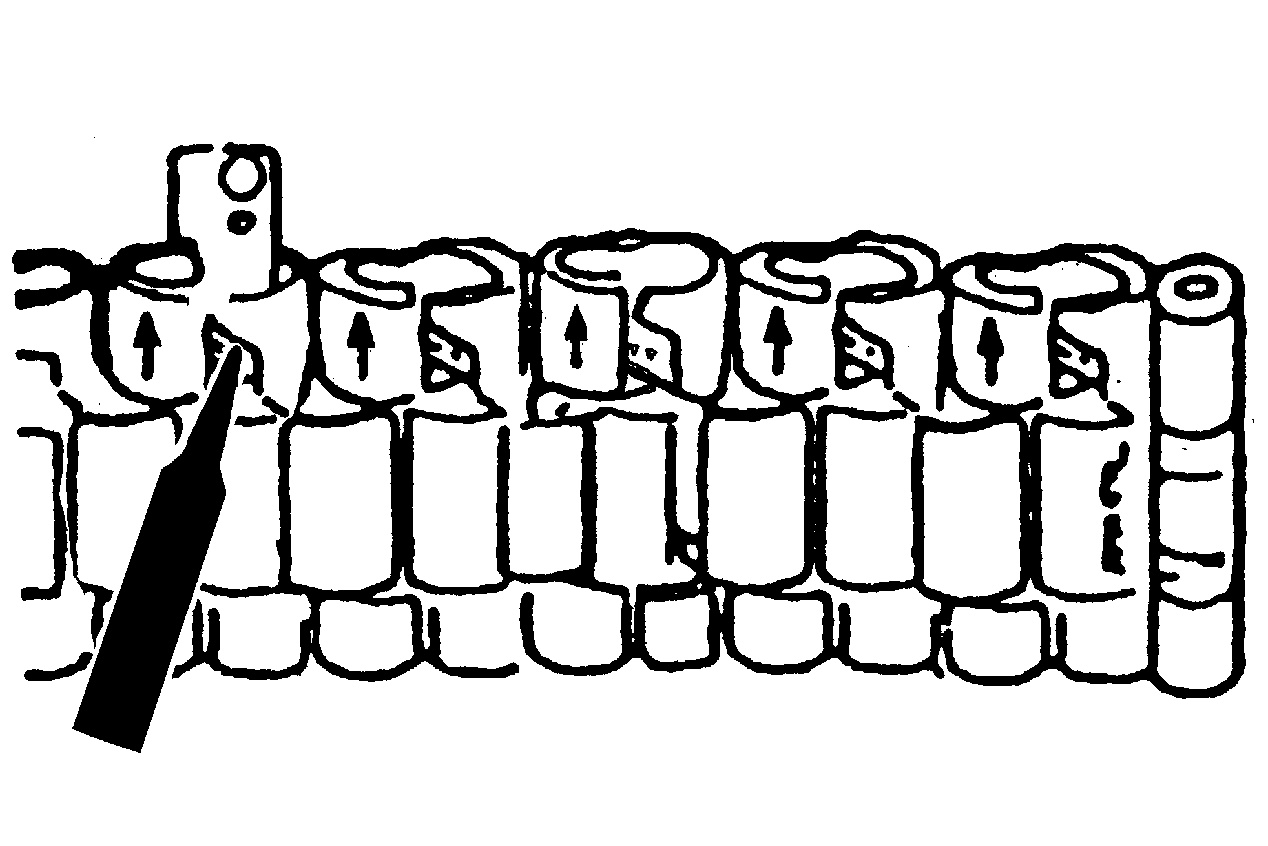
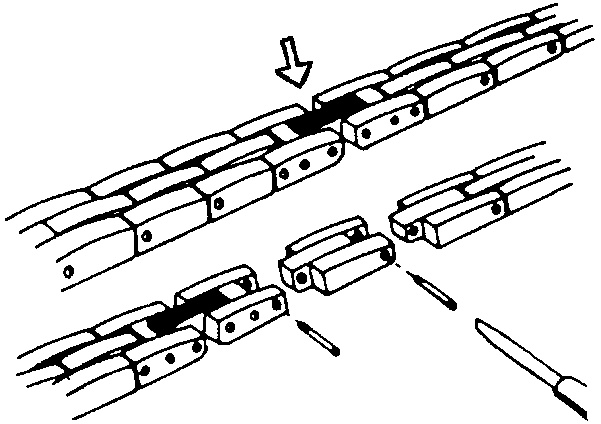
Re-Assembly

Bracelet link pin being pushed back in the opposite direction and pressed flush into the bracelet
  1. Rejoin bracelet parts.
  2. Push pin back into link in opposite direction of arrow.
  3. Press pin down securely into bracelet until it is flush.