Thank you for purchasing your TIMEX® watch. Please read
instructions carefully to understand how to operate your Timex®
watch. Your model may not have all of the features described in
this booklet.
NOTE: Watch is shipped with guard around crown.
Remove guard and push crown in to start. Compass must be calibrated
before using to ensure accuracy and avoid improper headings. See
Compass Calibration. Go to
www.timex.com/expedition
for help.
Watch incorporates magnetic sensor technology of Precision
Navigation Inc., Mountain View, CA.
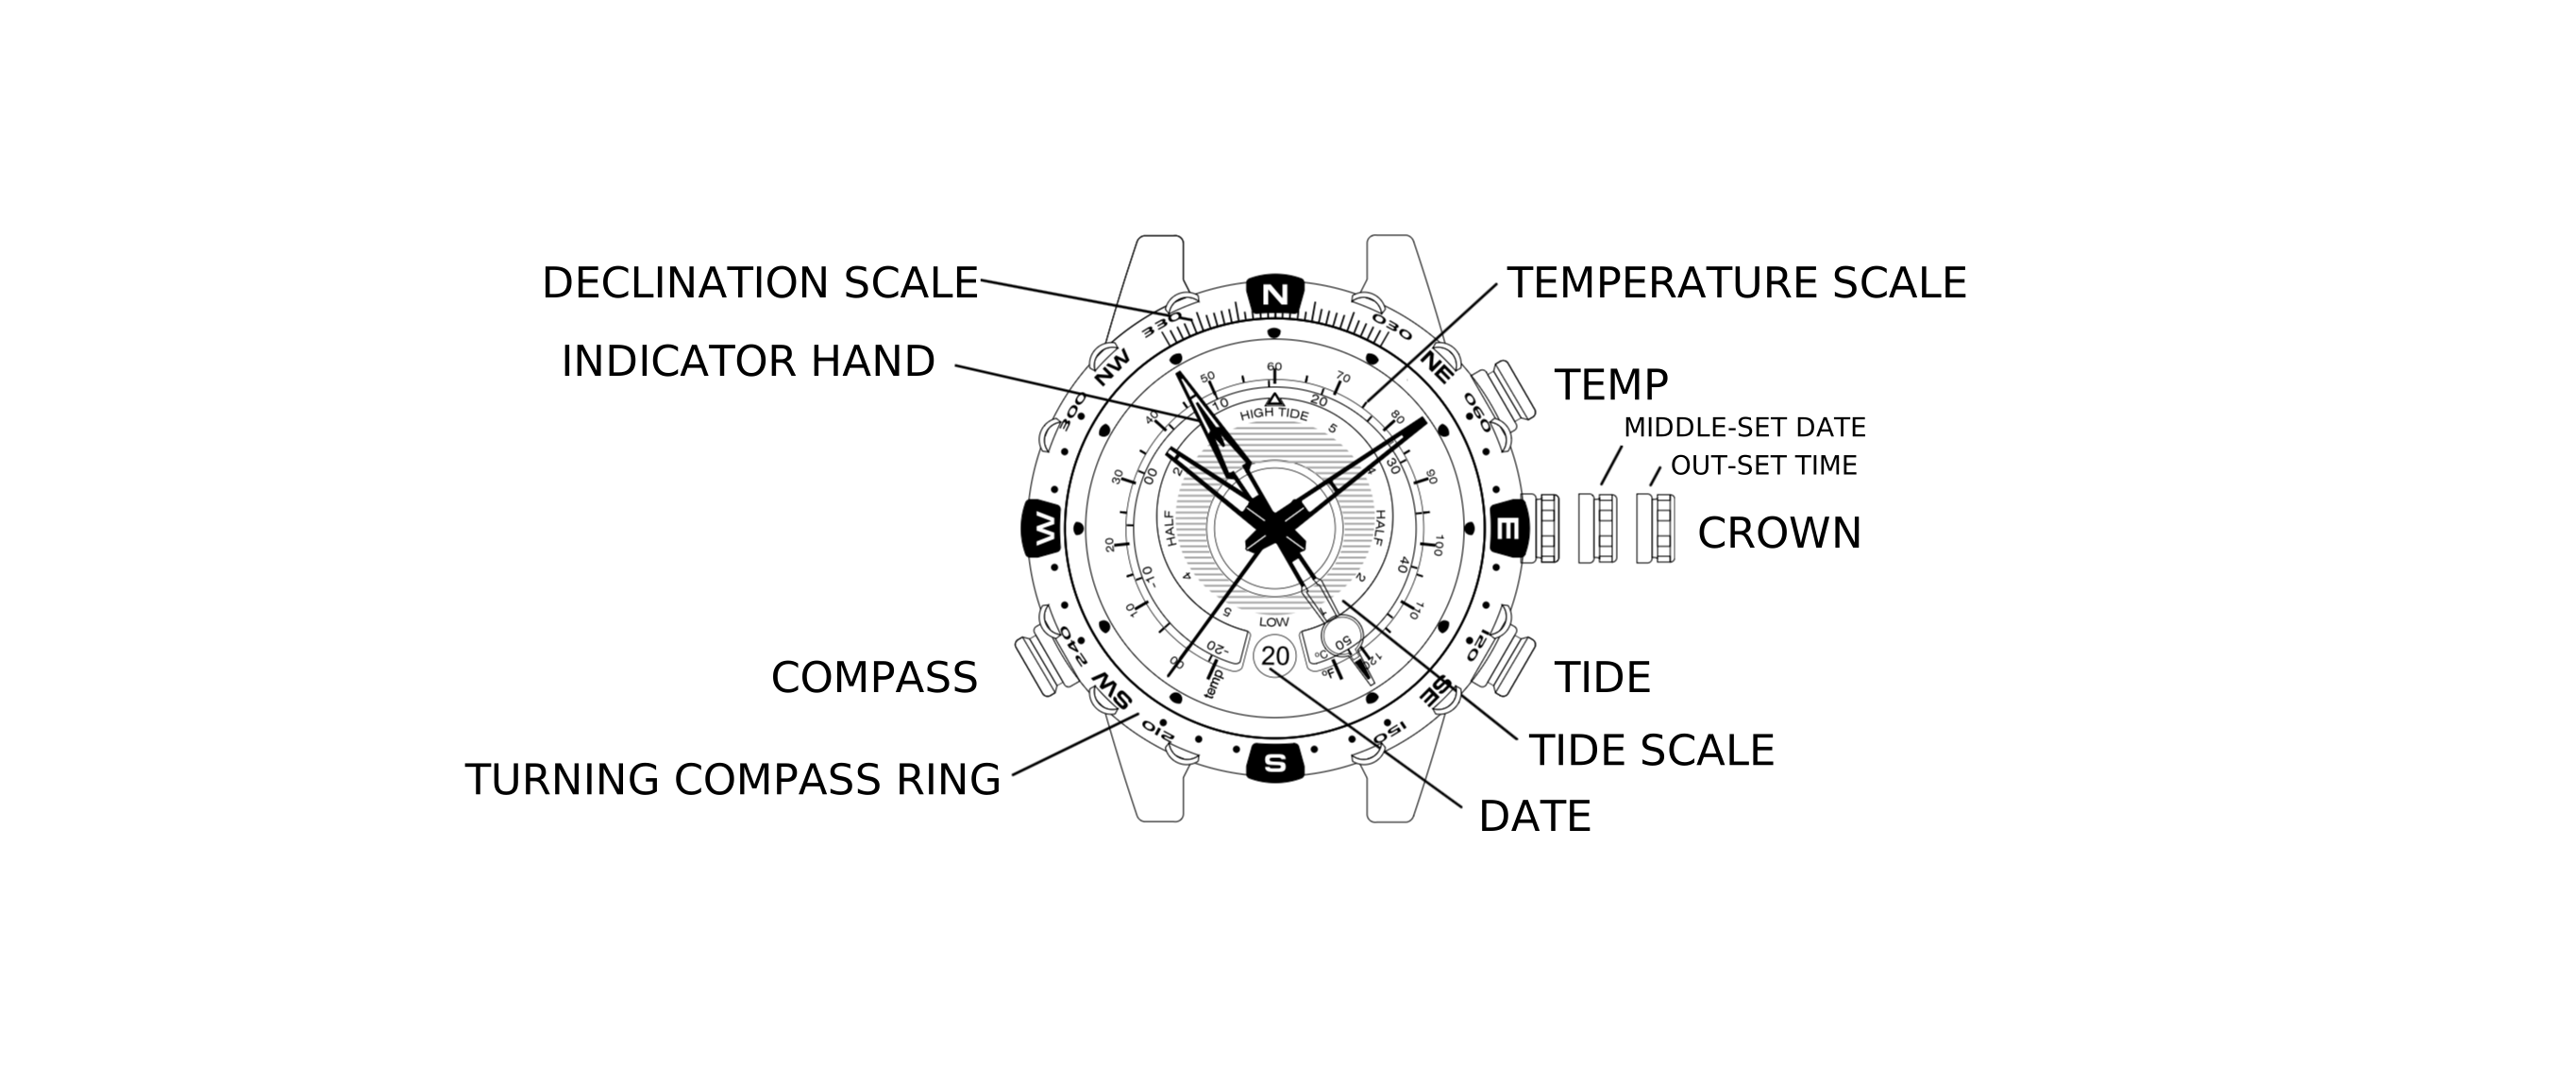
Watch Diagram
Basic Operation
Set Date and Time
Pull crown to MIDDLE position and turn until correct date appears.
After setting date, pull crown all the way out and turn until
correct time is shown. Ensure correct AM/PM setting by verifying
that date changes at midnight, not noon. Push crown in when done.
Adjust date after months with fewer than 31 days.
Indicator Hand Adjustment
Pull crown all the way out. Indicator hand should point to
12 o’clock. If it does not, press either TIDE or TEMP push
button to move hand until it points to 12 o’clock. TIDE and
TEMP push buttons move hand clockwise and counterclockwise,
respectively. Hold push button to move hand fast. Push crown in
when done.
Tide/Temperature Selection
Indicator hand shows either tide or temperature constantly. When
temperature is shown, press TIDE push button to select tide clock.
Hand moves to low tide and then to current tide. When tide is
shown, press TEMP push button to select thermometer. Hand moves to
beginning of thermometer scale and then to current temperature.
Tide Clock
For tide clock, indicator hand always rotates clockwise, so tide
is rising when hand is pointing left and falling when pointing
right. Number of hours to next high/low tide is shown on tide
scale.
The primary factor in determining tides is moon position. Tide
clock uses moon position to predict high and low tides, which are
6 hours and 12.5 minutes apart.
Tides are also influenced by sun position and shape of shoreline,
so tide clock cannot precisely give times of high and low tides.
Periodic adjustment may be necessary.
To set tide clock, pull crown to MIDDLE position. Press either
TIDE or TEMP push button to move hand to current tide. TIDE and
TEMP push buttons move hand clockwise and counterclockwise,
respectively. Push crown in when done.
When worn on wrist, thermometer reading is affected by body heat.
For more accurate readings, remove watch and put in shade for at
least several minutes.
Watch can measure water temperature also, if submerged. Be sure to
select temperature display before placing watch in water, as
buttons should not be pressed when watch is underwater.
Thermometer readings are taken every minute, and more frequently,
if temperature is changing.
Compass
Compass Calibration
Since a compass uses the earth’s magnetic field, you must be
aware of large metallic objects, such as vehicles or bridges, or
objects that give off electromagnetic radiation, such as TVs or
PCs, which could affect the magnetic field around the watch. If
compass is calibrated near such objects, it will only work
properly in that same location. If compass is calibrated away from
such objects, it will not work properly near them. For best
results, calibrate in area of intended use.
In calibrating and taking headings, it is important, as with all
compasses, to keep compass level. Calibrating or taking a heading
when watch is not level can result in large errors. Also avoid
areas that may exhibit higher than normal concentrations of hard
and soft iron, as they may cause inaccurate headings. Whenever a
heading is suspect, recalibrate.
Do not store watch near any source of magnetism, such as
computers, appliances, or TVs, as watch can take on a magnetic
charge, yielding inaccurate headings.
To calibrate compass, pull crown to MIDDLE position. Keep watch
level or place on level surface (if band interferes, place watch
on inverted cup). Watch may be face down, but take care to protect
watch face. Press COMPASS push button to begin. Indicator hand
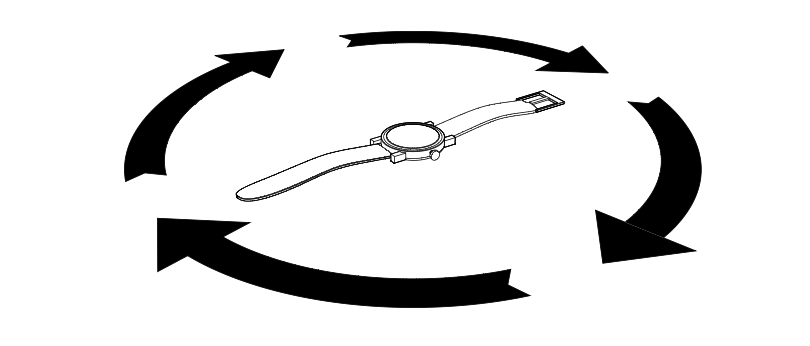
rotates two revolutions to remind you to rotate watch. While
level, SLOWLY rotate watch two revolutions, taking at least 15
seconds per revolution. This is critical in achieving proper
calibration.
When done, press any push button, keeping watch level. Indicator
hand moves back and forth to acknowledge end of calibration and
then moves to current declination angle setting (see Declination
Angle for more information). If you do not wish to set declination
angle, push crown in. Otherwise, to have watch automatically
compensate for declination angle, turn compass ring until north is
at 12 o’clock. Press either TIDE or TEMP push button to move
indicator hand east (+) or west (−) to point to your
location’s declination angle (see table below) using
declination scale. Hold push button to move hand fast. Push crown
in when done.
Compass Operation
Normally, compass is off and indicator hand shows tide or
temperature.
Compass must be calibrated prior to use and calibration should be
performed in the area of intended use; see Compass Calibration. If
compass has not been calibrated since battery replacement,
attempting to activate compass causes watch to rotate indicator
hand once and play melody to remind you to calibrate.
While holding watch level, press COMPASS push button to activate
compass. Indicator hand moves to point north. If watch is turned,
indicator hand will continue to move, always pointing north. After
20 seconds, compass will automatically turn off and hand will
return to its normal operation. This conserves battery life. Press
COMPASS push button at any time to keep compass on for another 20
seconds.
Using the Compass
Once compass is activated, as described above, there are two
typical ways to use it.
Which way am I headed? Hold watch so that 12
o’clock is in direction of your travel. Turn compass ring
until indicator hand is pointing to north on ring. Your heading is
direction on ring at 12 o’clock.
Which way should I go? If you know the direction
you want to go (e.g., NE), turn compass ring until that direction
appears at 12 o’clock. Hold watch so that you are facing 12
o’clock. Then, turn your body until indicator hand points to
north on compass ring. You are now facing the direction you want
to go.
Declination Angle
A compass needle points to “magnetic north,” which may
be slightly different from “true north,” which is used
on maps. This difference, called the “declination
angle,” which varies around the globe, is typically small
and can be ignored in many cases. However, if you wish to
compensate for this difference, there are two ways to do so. You
can do it manually by turning the compass ring so that indicator
hand points to your declination angle (see table below) instead of
north, using declination scale on compass ring. Or, you may have
the watch automatically compensate by setting your declination
angle after compass calibration; see Compass Calibration. With
proper declination angle set, indicator hand will point to true
north.
Declination angles for major world cities (W is negative and E is
positive on declination scale):
Press crown to illuminate watch face. Electroluminescent
technology used in the INDIGLO® night-light illuminates entire
watch face at night and in low light conditions.
Bracelet Adjustment
Foldover Clasp Bracelet
Fig. 1.Fig. 2.Fig. 3.
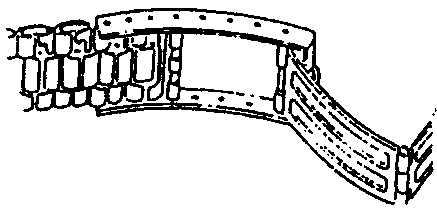
Find spring bar that connects bracelet to clasp. Using a pointed tool, push spring bar in and gently twist bracelet to disengage.
Determine wrist size, then insert spring bar in correct bottom hole.
Push down on spring bar, align with top hole and release to lock in place.
Bracelet Link Removal
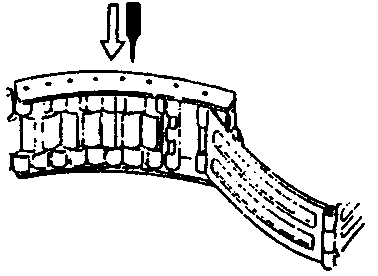
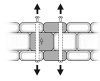
Removing Links: Place bracelet upright and insert pointed tool in opening of link. Push pin forcefully in direction of arrow until link is detached (pins are designed to be difficult to remove). Repeat until desired number of links are removed.
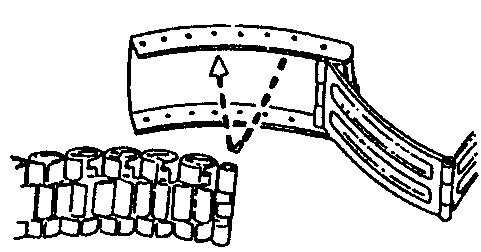
Reassembly: Rejoin bracelet parts. Push pin back into link in opposite direction of arrow. Press pin down securely into bracelet until it is flush.
Solid Link Bracelet
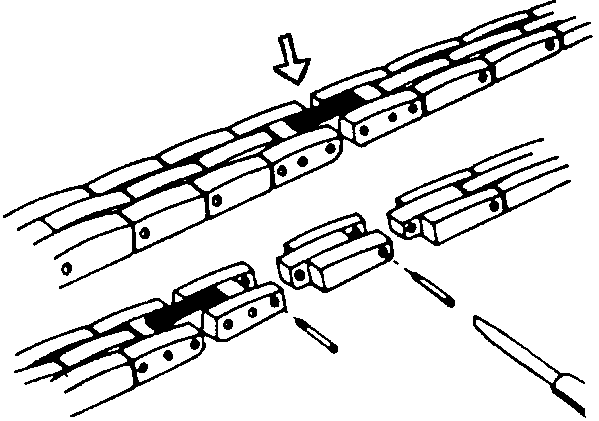
Removing Links: Using a very small screwdriver, remove screws by turning counter-clockwise. Repeat until desired number of links are removed. Do not remove links adjacent to clasp.
Reassembly: Rejoin bracelet parts and insert screw in end of opening where it was removed. Turn screw clockwise until tight and flush with bracelet.
Barrel Link Bracelet with Screw Head Pins
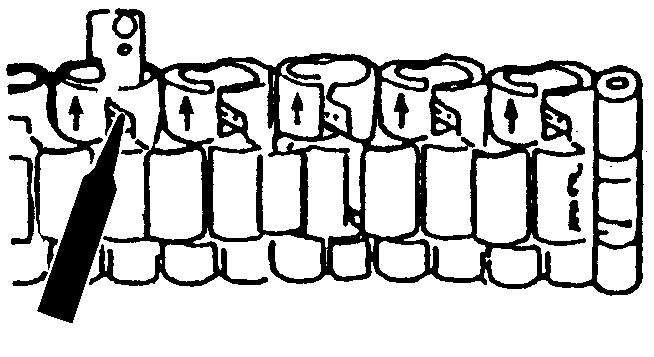
Removing Links: Removable links have arrows. Use one screwdriver near tail of arrow to prevent pin from turning. Using another screwdriver, remove screw at end near head of arrow by turning it counterclockwise. After removing screw, slide pin out. Repeat for second pin in link.
Reassembly: Rejoin bracelet parts and insert pin in end of opening where it was removed. Turn screw and other end clockwise until tight and flush with bracelet.
Water Resistance
Watch is water-resistant only as long as lens, push buttons and case remain intact.
Watch is not a diver watch and should not be used for diving.
Rinse watch with fresh water after exposure to salt water.
If your watch is water-resistant, meter marking or () is indicated.
Water-Resistance Depth
P.S.I.A.* Water Pressure Below Surface
30m/98ft
60
50m/164ft
86
100m/328ft
160
*pounds per square inch absolute
Battery
The watch button cell or coin battery is not intended to be
replaced by a consumer. Only a jeweler or other professional is to
replace the battery.

 ) is indicated.